
Outlook Recall Email Folder Location | A Complete Comprehensive Guide
Recalling an email in Microsoft Outlook can feel like a lifesaver, especially when you’ve hit “Send” too soon. But once you’ve attempted a recall, where does the email actually go? Understanding the Outlook recall email folder location is vital if you want to manage your messages better and stay in control. In this guide, you’ll discover how this feature works, where to find recall attempts, and how to improve your email experience confidently and efficiently.
What Is Email Recall in Outlook?
Microsoft Outlook allows you to unsend an email using the “Recall This Message” feature. This function attempts to delete the original email from the recipient’s inbox if certain conditions are met. Instead of sending follow-up apologies or corrections, recall helps you correct a mistake instantly.
Email recall is available only when both sender and receiver are using Microsoft Exchange or Microsoft 365 within the same organization. It won’t work with external accounts like Gmail, Yahoo, or Outlook.com.
How Does Email Recall Work in Microsoft Outlook?
Outlook recall works by sending a message to the recipient’s mailbox that tries to delete the original message. However, success depends on:
- The recipient not reading the original email
- Both parties using Microsoft Exchange
- The recipient being online and their Outlook being open
- No mail rules moving the email
It’s not magic, but when it works, it feels like it.
Why Knowing the Recall Email Folder Location Is Important
Understanding where your recall message goes is more than just curiosity. It’s about accountability, transparency, and efficiency. If your recall fails, you’ll want to know why. If it succeeds, you’ll want confirmation. Tracking these messages helps you learn from mistakes and build better communication habits.
Whether you’re in a high-stakes corporate setting or managing customer relationships, knowing this detail shows you’re serious about professionalism.
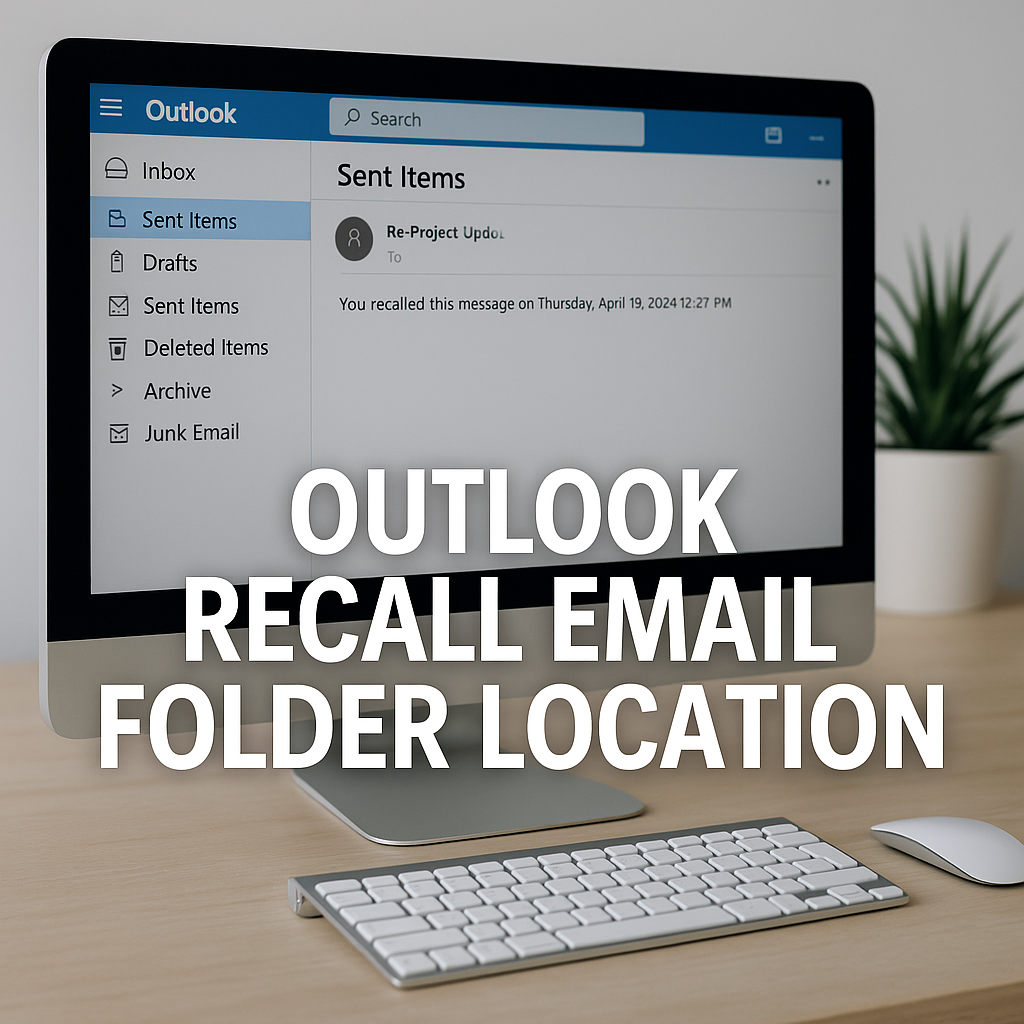
Where to Find Recalled Emails in Outlook (Step-by-Step Guide)
Your recalled email isn’t sent to a hidden place—it’s located right in your Sent Items folder. Here’s how to access it:
- Open Outlook and go to Sent Items
- Locate the email you want to recall
- Open the email and click File > Info
- Select Message Resend and Recall > Recall This Message
- Choose whether to delete unread copies or delete and replace
After you initiate the recall, Outlook keeps the original email in Sent Items. The recall attempt is also shown there, usually labeled as “Recall:” before the subject.
You can track the status of the recall through the same message.
Understanding the “Tracking” Tab in Outlook (Recall Results)
Once a recall is attempted, Outlook tries to track its outcome. This is where the “Tracking” tab becomes essential:
- Open the original message in Sent Items
- Click Tracking
- You’ll see statuses like “Recall Succeeded” or “Recall Failed”
If the recipient has already opened the message, the recall will most likely fail. Outlook makes it clear so you’re not left guessing.
What Happens to a Recalled Email (Backend Process Explained)
Recalling an email in Outlook doesn’t move it to a specific “Recall” folder. Instead, the system checks the recipient’s inbox and either deletes or leaves the original email based on the rules mentioned above.
Outlook sends a new message to the recipient’s mailbox. This message acts as a command to delete the original email if it hasn’t been read. If successful, the original message disappears. If not, the recipient may still see both emails—the original and the recall notice.
Common Issues: Why You Can’t Find Recalled Email Location
Sometimes, users believe there’s a dedicated “Recall Folder.” But there isn’t. The confusion often stems from these reasons:
- You’re using Outlook Web App, which may display messages differently
- The recipient is on Gmail or another external service
- Your email was moved by rules or folders
- You’re not checking Sent Items, which is where all recall attempts are stored
To avoid confusion, always check Sent Items and use message tracking.
Folder Paths and Shortcuts to Access Recall Attempts
Whether you’re on desktop or web, the path to your recall attempt is simple:
Outlook Desktop (Windows/Mac)
- Open Sent Items
- Locate and open the message
- Click File > Info > Message Resend and Recall
Outlook Web App (OWA)
- Go to Sent Items
- Use the search bar to look for the subject or use keywords like “Recall”
You can also add a column in your folder view to show the message type, making it easier to spot recall attempts.
Advanced Tips to Track and Monitor Email Recall in Outlook
Want more control? Here are some pro tips:
- Create a rule in Outlook to highlight or flag recall attempts
- Use VBA scripts to log recall status (best for IT departments)
- Enable read receipts to know when messages are opened
- Use Power Automate to trigger workflows for high-priority recalls
These tricks give you deeper visibility and can boost your confidence in managing email errors.
Best Practices to Avoid the Need for Recalling Emails
Why rely on a recall when you can prevent mistakes in the first place?
- Use delay send: Set Outlook to delay messages by 1-2 minutes
- Proofread thoroughly: Use spelling and grammar tools
- Use AI writing assistants: Like Microsoft Editor for polished messages
- Double-check recipients: Always verify who’s in the “To” field
By avoiding mistakes, you reduce the need to ask how to recall an email in outlook altogether.
Conclusion: Streamline Email Recall With Better Folder Management
While Outlook doesn’t have a dedicated “Recall” folder, understanding how the feature works and where to find those messages empowers you. Staying organized, knowing your tools, and following best practices will keep your communication clear, confident, and professional.
Remember, the best emails are the ones you never have to recall—but when you do, now you know exactly where to look. This clarity can save you time, reduce stress, and improve how you use Outlook every day.
If you’re emailing someone with a Gmail account, keep in mind that a Recall email Outlook Gmail recipient scenario won’t work. Outlook recall only functions within the same Microsoft Exchange or 365 domain.
FAQs About Outlook Recall Email Folder Location
Where do recalled emails go in Outlook?
Recalled emails don’t go to a special folder. They remain in your Sent Items folder with the subject line starting with “Recall:”. Outlook tracks the result and stores it with the original email.
Can you see if an Outlook email recall was successful?
Yes. You can view the Tracking tab in the original message inside Sent Items. It will tell you if the recall succeeded or failed for each recipient.
Why can’t I find my recalled message in Outlook?
If you can’t find it, you may be looking in the wrong folder. Always check Sent Items. Also, if you deleted the recall message or it’s filtered by a rule, it might have moved elsewhere.
Is there a specific Outlook folder for recalled messages?
No, Outlook doesn’t create a new folder for recalls. All recall attempts stay in Sent Items, and their status is tracked there.
How do I know if someone recalled an email sent to me?
You’ll usually receive a message saying that the sender wants to recall the previous message. If you haven’t read it, it might disappear; otherwise, you’ll still see both the original and the recall request.


